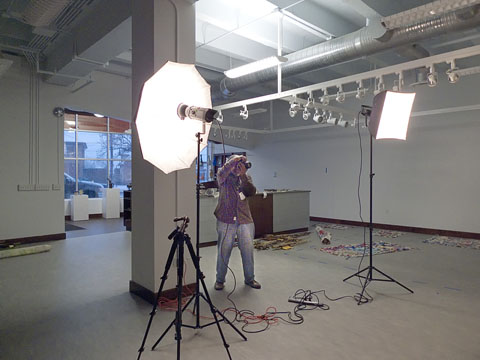
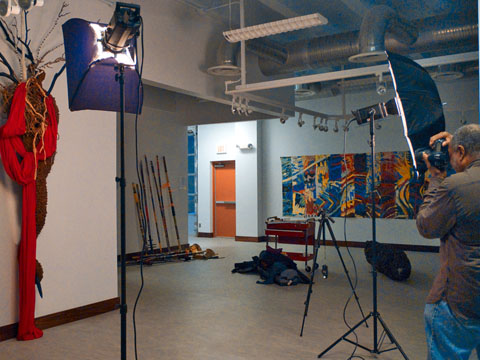
Late afternoon, Wednesday, I did a quick and dirty location photo shoot of a piece of art for my friend Martha Jackson Jarvis. The shoot took place at Prince George’s African American Museum & Cultural Center, in Brentwood, MD. Martha will be in an exhibit, Resonant Forms, with artist Frank Smith, and Alonzo Davis. OK. I was at the gallery to photograph a piece for Martha titled, Scarecrow. The reason why this was to be quick & dirty was that by the time Martha & I got to the gallery about quarter of an inch of slush from freezing rain was on on the ground. By the time I had set up my lights, about 20 minutes later, the freezing rain had turned to heavily falling snow. With about an inch of snow on the ground and an early rush hour, we all wanted to hurry up and get out of there. DC doesn’t do snow very well!
The setup was pretty straight forward. Two Calumet Travelite 750 strobes. One with a small Chimera lightbox as the main light, and another Travelite with a 24 inch Calumet umbrella, as the fill. Because of the sudden state of urgency, along with Alec Simpson, director of the Art Exchange, & his staff wanting to get out of there, I didn’t have a lot of time to finesse the lighting. So after I got things up, and Martha was OK with the basics, I started shooting.
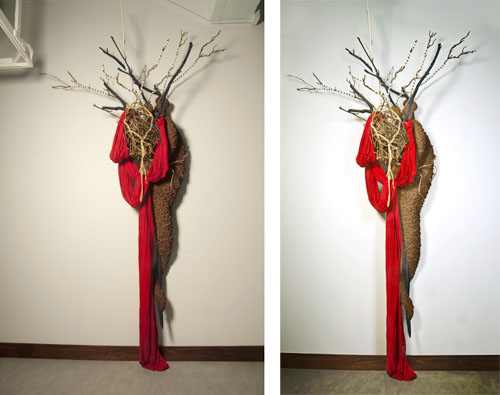
When I was shooting this shot I was thinking of how I would be doing the re-touch in Photoshop. When doing this you don’t want to be sloppy.or the retouch can go horribly wrong. This shot is for the exhibition catalog and other PR for Martha and the exhibit. So I want it to be very tight for publication. So when I got back in an choosing the best exposed RAW file, I first brought the image into Adobe Camera Raw. Here I did the basic exposure & color cleanup adjustments before exporting it into Photoshop. Next, I use Nik Define 2.0 to quickly reduce any luminous noise. I shot at ISO 200 so there really wasn’t much, but Define cleaned it up. After Define I used the Stamp tool to get rid of pipes and light fixtures that where in the way. I actually cropped the image first to minimize this work. Next there was some tonal enhancement to accentuate the lighting that was already present in the shot. This help the over all contrast. Finally I added a touch of drama and place with a burn & dodge hand painted vignette.
I thought I was done, (and I pretty much was!) but the shadow on the image’s right side was too strong, So, I cloned it out , but that looked strange. Since the cloned data was on its own layer, I simply reduced its opacity. Now I could control that shadow, as if I changed the intensity & placement of the actual fill flash. Now I was done. I always keep the layered files, ya never can tell! I created a JPEG for Martha to give to the Gallery, and now I was done!

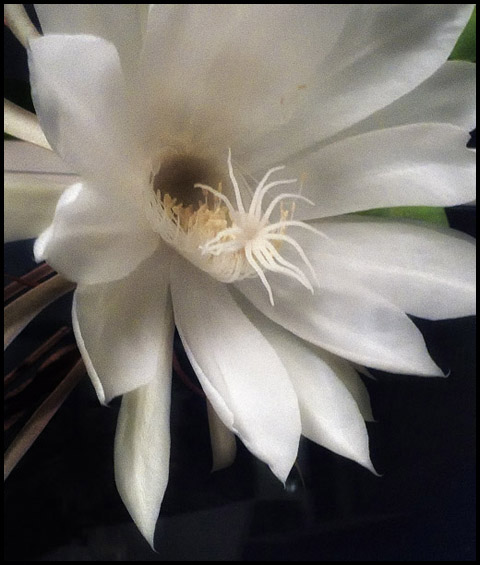 On New Year’s Eve, I wasn’t exactly surprised to see that around 9:00PM, my Night Blooming Cereus was starting to open up. From the first sighting of the bud to the final bloom, takes about 10 days. I always know when it’s blooming, not by sight but by smell. The Cereus has a distinctive mild, sweet, aroma. I have always had the belief that my Cereus bloomed at special occasions. Sometimes these occasions are happy and sometimes not. Yet, the Cereus’ flower presents itself at some magical interface. So I look for 2011 being a magical positive year!


