Glyphs of Time :: a blog by jarvis grant

July 29, 2016

Farewell Exaniner.com

Filed under: Education,Media,Observations,Photography — Tags: , , — Jarvo @ 1:05 pm


Examiner-Icon1Examiner.com gave me the freedom to write about almost anything. I enjoyed writing, about  Photoshop, giving commentary about the photographic arts and its related technologies. I also enjoyed being a member of the photography industry news press corp.  As an educator, it was a wonderful platform. I soon found out finding a similar platform wouldn’t be easy. Many of these online news outlets focused on photo gear like new cameras, lens, and other photo toys. All that’s well and good, but my interests are in technology that’s not based on instrumentation alone but on process. I’m still researching the options and how to adapt to them.

So until I can find such a platform, I’ll have to do it the old fashion way, build it myself. Over these past two weeks I’ve thought about the options I have. My Examiner.com articles are a useful educational resource. So first I need to create an archive for them. I have Word docs of all of them along with images and video links. I also downloaded all of them as PDFs because many of them have the final editorial edits. Right now I’m thinking of republishing them in a separate WordPress site. I’ll see how that goes. I forgot about my subscriber list so I’ll have to build that again too.

I will keep you informed and will solicit your comments and feedback. Many thanks for your continuing support.

Jarvis Grant - Washington DC Photoshop Examiner - Tech Gear. | E

Well, so long Examiner.com! Can’t wait to see what will happen next.


Share

May 1, 2012

Composites: Selections, mask and more!

Filed under: Design,Education,Observations,Photoshop — Tags: , , , , — Jarvo @ 4:18 pm
Full Screen Shot

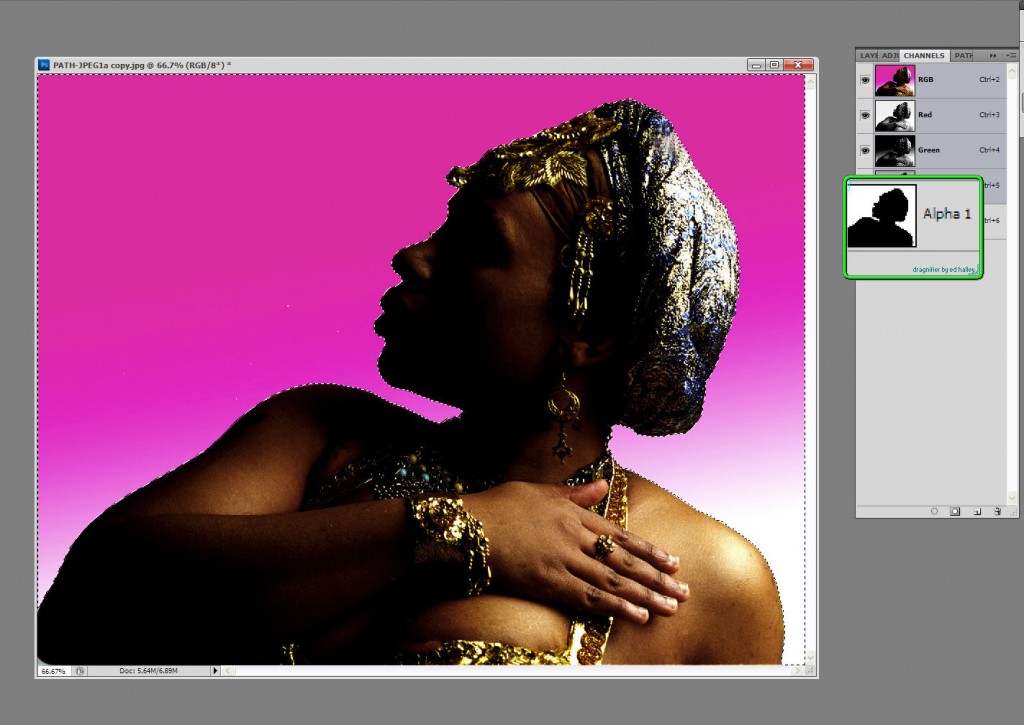
Selections are Alpha Channels that are used in creating Mask. Here is the main figure used in my composite, "Isis". ©Jarvis Grant 2012

Knowing how to make a selection in Photoshop is an artist’s secret weapon. It’s the most important tool/technique that one should master as early as possible. With that said, there is no single “best” ways to create a selection. Everyone has a couple of go to favorites. New students usually start with what Scott Kelby coins as the “Tragic Wand”. Once you understand that there’s more tragic than magic  in that wand, you start to look for options. For many it’s using the Path Tool, which I personally hate! For others it can be the Color Range command. The folks at Adobe know that power and the pain of creating selections and have been developing the Refine Edge command into its on Panel in Photoshop since version CS4. Back in the day, those “marching ants” were at the heart of composting images for designers and illustrators. Yet today there can be more to making a composite than selections.

I’m thinking and writing about this topic because last week I put together  an article on Examiner.com on Saving Selections in JPEG Files. When ever I do an article I first collect the images I’ll use for the article. Then I’ll go through what ever process I’ll be writing about to get the steps clear in my head. First, I wanted to choose an image that I could make a very simple selection with. I had a partial silhouette shot in the studio that would work fine. Went through th steps and made a few screen shots. I was done. The only thing needed now was a new background for the figure to illustrate the new image composite. No big deal, two layers and that will be that. I had a few NASA wallpapers from the Hubble Telescope web site I felt would make a quick and dirty yet fairly interesting image. In fact it turned out to be interesting enough that I seemed to be on a roll! So much so that I began to think about this blog post.

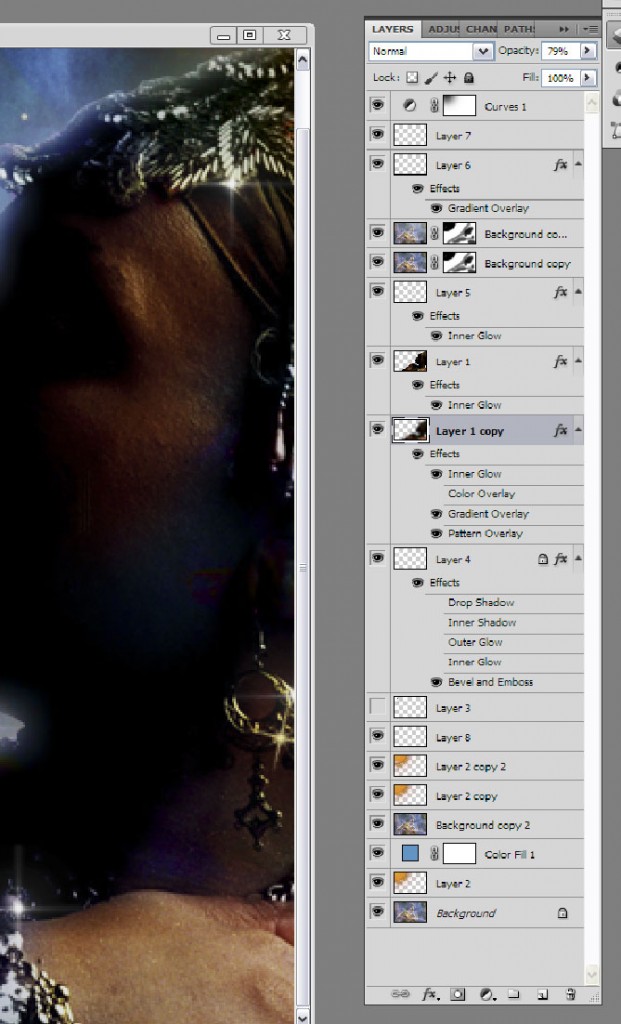
The Layer Panel for Isis

What started just to be two layers turned out to be a few more. ©Jarvis Grant 2012

What started as a simple story with two layers began to grow. Once the main story was invented, I needed to enhance the “mood” of the piece. To achieve this I began to use Blending Modes. The interesting thing was that I was still just using the the main images of the figure and her new background. Using Layer Masks, dupes of the background were now being place on top of the figure, with elements being hidden or accentuated. Portions of the figure were selected and moved to their own layer and painted with Layer Styles. I also had a little help from Flaming Pear and Dover Publications. Well my point here is to not really go into detail of how the new image was made, but to speak to the fact that when “building” a composite it takes more than just ‘marching ants”.

While the final image is a fantasy, as a photographer, I still need elements of reality to bring it altogether. What is the direct and ambient light doing? Along with a healthy dose of trial and error. For example the NASA image though stunning, had a few visual holes into once the two images were placed together. I didn’t want to select stars from the background, because it only had a few, and I waned a little more variety. I found a few “space and star” brushes on the Internet. Through some that “trial & error”, I placed my new “stars” on their on layers and used Gradient Overlay Layer Styles, set to radial mode to give my stars that refraction of color that telescope give to photographs.

This was a simple artistic exercise that also used another secret artistic ingredient, Fun! In having a little fun I learned a few tricks and techniques that will turn up later in future work. Or maybe not! What started out as one thing with one purpose grew into something else. It also shows that even through working with a computer can seem overly technical, in the end, Photoshop is just another tool for artist to use and flow with.

A Dream of Isis

The final composite (so far!), of "A Dream of Isis" ©Jarvis Grant 2012

 
Share

April 21, 2012

Photoshop World DC 2012: Cool & Fun

PSW 2012 Seal

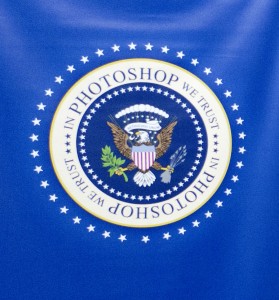
Photoshop World DC Seal

Well Photoshop World DC has come and gone! It was great having Photoshop on the Green & Yellow Metro line. No airports hassles, no hotel hang ups, just a quick three block walk to the Metro and then a quick 15 minute ride. BAM, I’m there! Photoshop World, a three day Photoshop Lovefest!  Yet I must confess, it’s not the experience it used to be for me ten years ago. While I felt I knew my way around Adobe Photoshop back in 2000, I began my digital imaging experience with Aldus PhotoStyler 1.0 in 1993 and migrated to Photoshop 3.0 in 1995 (Adobe bought Aldus). Photoshop 5.0 was still quite the Magic Box. Scott Kelby and NAPP  (National Association of Photoshop Professionals) opened a brave new world of digital imaging and design to me. Back then Photoshop World was simply amazing! Back in the day, Photoshop was a design, illustration, and prepress tool. Despite its name, there was very little photography going on at Photoshop World. There was only John Paul Caponigro and Jim Divitale talking about Photoshop for photographers.

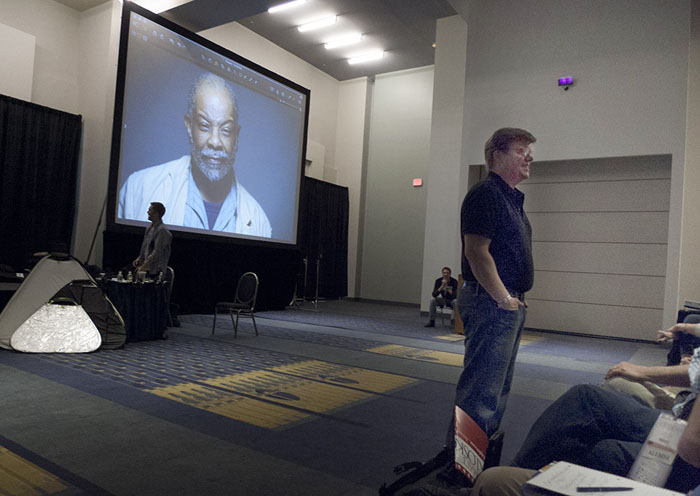
Joe McNally explains speedlite technique with yours truly as workshop model! ©Jarvis Grant

Well, now all of that has changed. Photoshop World is extremely photography centric.  There’s was very little talk of design issues, no prepress except for two sessions by Dan Margulison LAB color, some video and some web, and a little video. The rest was photography. I should be happy, right? Well, I was. But after 30 plus years as a photographer and arts educator, I know the relationship of exposure of/stop, shutter speed and ISO, marketing, an exhibiting fine art photographer, etc. Plus, I also know that gear has very little to do with great image making. I’m also a Photoshop ACE (Adobe Certified Expert). I say that not to imply I’m a giant Photoshop Intellect. Not by any means.  For the most part Photoshop World, this year, allowed me to see that I was on the right track in my continued career goals, and that I actually know a thing or two! But hey, I am always looking for a couple of jewels to add to my utility belt.

Those pearls of wisdom and magic did present themselves to me from Calvin Hollywood and Greg Hessler. I got my Photoshop fix from German photographer Calvin Hollywood and my photography inspiration from Greg Hessler. Plus the mad cap antics Russell Preston Brown can be a bit “over the top” they never, ever disappoint! Not to mention some old tile religion from from speedlite wizard  and photo journalist Joe McNally. Some really good stiff. Whoa, don’t let me forget the geeky-krazy Corey Barker. Corey is very old school Photoshop. His Photoshop For Designers session definitely got to the core of what being a Photoshop Maestro is all about! He is also the creator of Photoshop Planet.

So, the next stop for Photoshop World is at Las Vegas, officially known as Photoshop West. If you have never gone to a Photoshop World, check it out. Also, when you go, don’t walk around with your Big-Ass DSLR! What’s the point? There’s nothing to shoot with it, except for at a couple of booths that do have models and lights set up. I recommend taking a  point & shoot. You’ll be be more free, and you’ll get more photos, and besides you’ve got three days!

Slideshow:
Fullscreen:
 
Share

March 18, 2012

Photoshop World 2012 Comes to Washington, DC

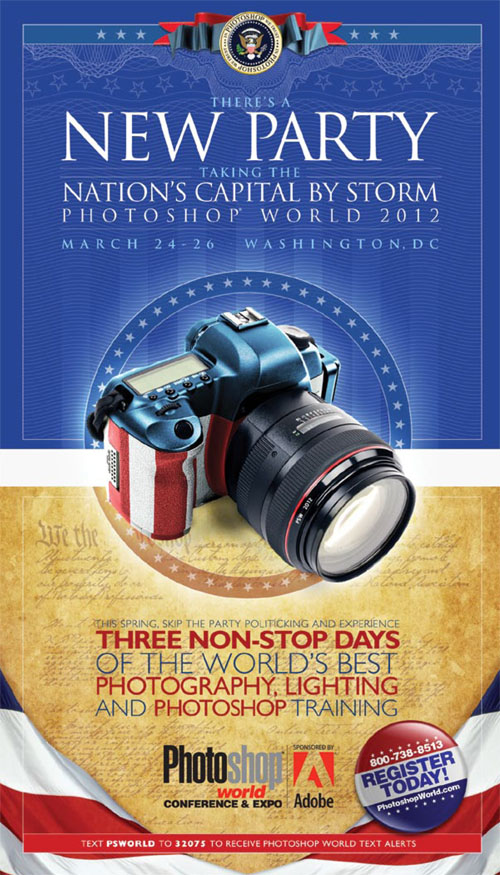
Photoshop World DC 2012 Poster

Photoshop World 2012 East Comes to DC! ©NAPP

Well, NAPP’s (National Association of Photoshop Professionals) Photoshop World is finally coming to the nation’s capital! That’s great, cause that’s were I live! Ya know, I’ve been a member of NAPP since 2000, or is it 1998? At any rate it has been for quite some time. NAPP is, by far, the best professional organization for people who use Photoshop and want to learn more about the program. With that said, Photoshop World is the best way to immerse yourself in all things Photoshop. The worlds best trainers and authors of Photoshop are in one location, and attendee have the best opportunity for meeting and conversing with them one on one. Photoshop World also affords you the chance to connect with vendors who are on the cutting edge of digital imaging. Well, at least the cutting edge at that moment! Now, with that said, Photoshop World can be like a Miles Davis concert during the 1980’s. As strange and bizarre as it can be, you can’t get help get a Golden Nugget unavailable anywhere else.

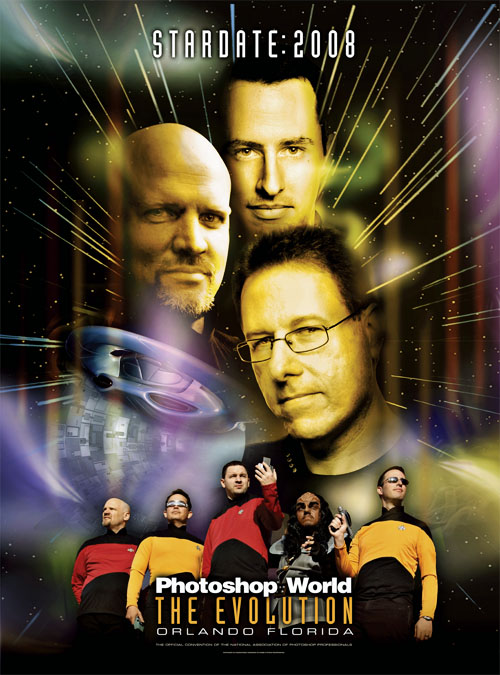
Photoshop World 2008 "Star Trek" theme

I wasn't going to the 2008 Photoashop World until I found out it was going to have a Star Trek theme! ©NAPP

Each year the conference has a theme. It can be anything.  From Formula One racing to boxing.  Themes can be based on popular culture like like Motown (Photown!) to a KISS Concert and  Star Trek. Kinda wacky for sure. Yet the business of doing Photoshop is taken very seriously. When I first started going to Photoshop World is was graphic design and illustration. Then later, web graphics, and finally photography and  digital video. Whatever’s the trend Photoshop World tries to get its membership up to speed on it. Yet I have to say, when I first attended Photoshop there was very little about photography. John Paul Caponigro and Jim DiVitale were the only Dream Team members that talked about photography and then Kevin Ames.  That’s because they were photographers! Then Russell Brownbegan showing photographers some very cool Tips & Tricks.Now, it seems Photoshop World has turned into a photography conference, simply because that is the “trend”.

Okay, with all that said, if you are in the Washington DC metro area, you should definitely stop by Photoshop World, If you’re not interested in the full conference, or think it’s too expensive, then get the Free Photoshop World Expo Pass. This pass will allow you to visit the Photoshop  World Expo floor. At the Expo many of the Photoshop Dream Team Instructor will be giving 30 minute  presentations.

So be sure to stop by the Photoshop World. It’s a three day Photoshop Love Fest  well worth the visit! You can stay in touch via the Photoshop World Hashcaster Site  and The Official PSW iPhone App.

See ya there!

 
Share

December 20, 2011

The Adobe InDesign Online Cheat Sheet

Filed under: Digital Tech,Education,How-To — Tags: , , — Jarvo @ 12:46 pm

I have found that sometimes the best and fastest way to get to info that I need is to post it on my own blog! Here’s a great resource I found on Terry White’s blog. The Adobe InDesign Cheat Sheets.

Complete List of InDesign Shortcuts

Courtesy of Business Stationery

 
Share

September 14, 2011

Amtrak Northeast Regional: Part 1

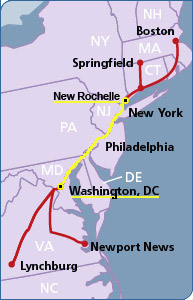
Amtrak Northeast Regional Map

My route from Washington, DC Union Station to New Rochelle, NY.

I’ve been traveling on Amtrak since I was in college in the early 1970s. During those days the train only stopped at New York Penn Station. Now Amtrak’s Northeast Regional,  stops a little closer to my hometown of Mt. Vernon, NY at New Rochelle, NY. So, for the past three years I’ve been going up to New York on a more regular bases, about 5 times a year. Checking in on my Mom and my daughter, Maya. Now, Maya grew up in DC, but has recently moved up to New York to live her dream of being an artist and helping her Grandma. She’s really making a go of it and is doing better at it then in DC. I find that interesting because DC is a smaller creative market than New York, and a bit easier to break into. But New York is more progressive and a real art town.

Okay, now during all those years of riding the train, I would a photograph here and there, no big deal. Spent most of the ride sleeping. During the past three years I got a really nice point & shoot digital camera, the Panasonic Lumix LX3.  The camera is small, fast and pocketable with a wide angle f/2.0 Leica zoom lens. This camera allows me to shoot more pictures, about the equivalent of 7 rolls of film, on a two gigabyte memory card. I love it. Very surprised with the images I’ve been producing with during my mini train journeys.  I also carry an extra memory card and battery. That’s almost a brick of film, for those who remember film bricks!

Now a few things have been happening. The first is that I’ve been becoming more familiar with the scenic’s of the trip. Though I’ve become familiar with the views, I’m not familiar  enough to setup and be ready to take a shot. A lot is still hit and miss. A little more miss than hit it turns out! Still I’m learning how to get better shots. After all, I can’t ask the conductor to stop the train or slow it down. So I’ve worked out a methodology for shooting. It goes something like this. I tend to anticipate a photo. As we approach the scene, I’ll ten decide to push the shutter or not. If not and I feel I should have, that composition I missed will go into my mental archive of possibilities. As this archive grows, the potential of making a good shot increases. So I’ll miss “that” shot, but the possibility of something similar appearing again down the track or during another trip increases.

Conductor on the Amtrak Northeast Regional

Conductor on the Amtrak Northeast Regional, leaving New Rochelle, NY on to Boston. ©Jarvis Grant

The next thing that happens when photographing out the window is camera handling. When a stretch of scenery seems promising I turn the camera on so it will be ready to go. Hey the camera is fast, but it’s still a point & shoot. When I firat point the camera out the window, it takes the sensor/light meter about three seconds to adjust to the change of light and become operable, and another 2-3 seconds to focus (if I’m lucky). A lot can pass by in 6 seconds as the train speeds on. I also set the camera to “Burst Mode” so it can keep taking pictures and give be more options of a scene. The downside of Burst Mode, is the camera takes time to process those photos. During that processing time the camera can’t take any new images. Finally, if it’s bright, I put the camera on “Program” so I don’t have to think about exposure and other camera stuff. As it gets darker, I go to Manual Mode or Shutter Priority. More techno thinking and a little less esthetic thinking. Still, it’s all good fun, which is the bottom line along with having new photos.

Within this body of work there are a few thematic series. Below are a few sample images. I’m still working all these images out, sifting and sorting them out. So, in future post, I’ll share what I’ve been doing with these photos as I continue to ride the rails on the Northeast Regional.

Crossing the Bay between Philly and Wilmington

Crossing the Bay between Philly and Wilmington. ©Jarvis Grant


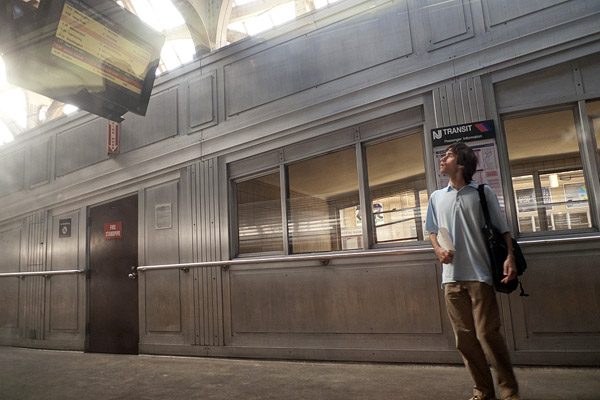
Traveler checking the time board at Newark, NJ Penn Station. ©Jarvis Grant

Traveler checking the time board at Newark, NJ Penn Station. ©Jarvis Grant


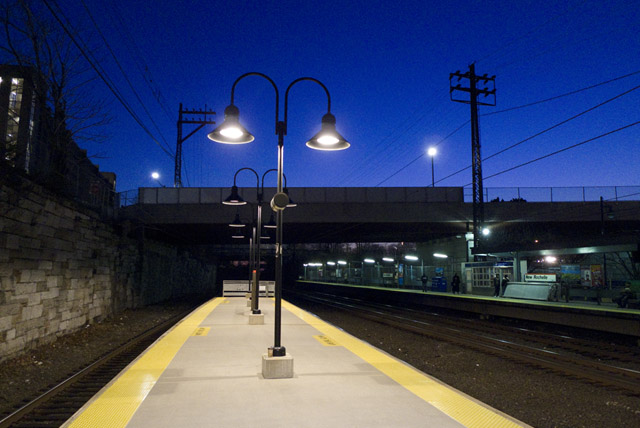
New Rochelle Station at Twilight. ©Jarvis Grant

New Rochelle Station at Twilight. ©Jarvis Grant

 
Share

May 18, 2011

Technology vs. Marketing

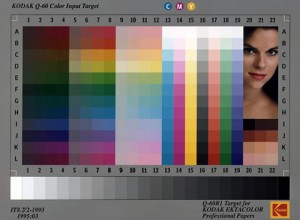
KODAK-Q-60-Color

The KODAK-Q-60-Color Standard

The other afternoon, I watched a webinar from a company I respect a lot, but won’t mention here. They have developed a new “technology” of color management. This technology is software based, and does a really amazing job of creating a complete and cohesive workflow of managing color from initial capture to final output. Now what I found interesting about this hour long webinar was it spent roughly 30-35 minutes marketing the product. It disguised or maybe cloaked this market hype in techno-babel. This techno-babel was used to give the audience “background” on the importance of color management. Okay. I guess?

My problem with the introduction was that, this technology was touted as a professional level tool. If that’s the case, then everybody tuning in knows that color management is. Right? OK, so after the intro, the software & its hardware components were explained, again. We were about 40 minutes into the webinar and the presenter ask moderator if there were any questions. The collective question was, What is the “best” or most practical way to operate the software and its hardware components? So, after 40 plus minutes of presentation the main question is, “How ya use the thing?” And why is that? Because the presenter used 35 minutes selling the damn thing!

This is my main concern with “Technology”. The company’s marketing department gets their hands on the concept and dumb it down to bullet points for PowerPoint presentations. Then they’ll express the concept’s innovation as price points. So, in the case of this webinar, the beauty of this software wasn’t made clear until the last 15 minutes of the presentation. And if not for the collective “What?” from the audience, it may have never come to light. As an educator for over 30 years, I believe the presenter could have been of better service to his audience by telling or teaching them why this equipment better serves their color management workflow. Yet this is the trend when speaking to photographers about anything “digital” or “high tech”. Toss them a bunch of tech-babel at a high enough price tag and they’ll bite. Why? Because if the concept is just barely comprehensible and cost enough it must be good. Thus placing one on the road to fame and fortune! Oh well.

I learned a long time ago that there’s a difference between technology and instrumentation. Technology is the concept or system behind an activity. Instrumentation is the tool for producing the results of that system. The technology of photography hasn’t changed much since 1840. The instrumentation and equipment on the other hand has. The aesthetics of photography and art in general are constantly in flux, yet the principles of design still hold true, for the most part.

So, what about the technology of color management and why one needs it? I think Andrew Rodney, gave a great example of it a few years ago at Photoshop World. He stated that color management is; “The ability to accurately and predictably control the reproduction of images from beginning to end of the imaging pipeline.” Color management is not, “Fixing bad color, especially bad originals.” The technology fixing incorrect color is Color Correction. Color management will ensure that “…even ugly color will be faithfully reproduced.”  So, the old adage still remains true, GIGO – Garbage In – Garbage Out.

So again, technology is a system or concept, not an instrument. I feel the presenter and the company could have explained their product without all the marketing hoopla.  If they would have done that the innovation of their product would have really shined. Here’s a very visual example of the technology of color management, and why you can’t trust your eyes alone to “manage” color. ©Edward H. Adelson

Slideshow:
Fullscreen:

 
Share

January 25, 2011

My New Photoshop for Photographers Class

SAAC Photoshop Class

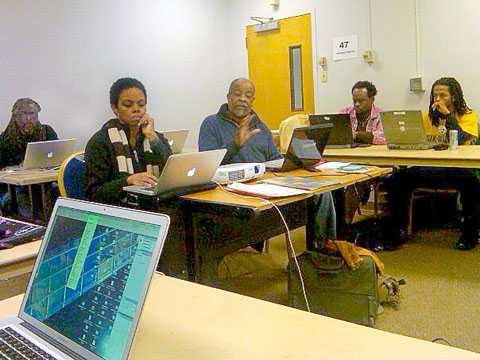
I discuss some of the finer points of Photoshop as Karen Baker works on her images during the class. ©Baba Kuroji Ntu-Patrick

On January 22, I gave my first class through the an organization called, Social Art and Culture, founded by Karen Baker.  The mission of SAAC is a broad yet focused one. It means to, “…encourage design that affects social change. SAAC “Art Activists” will use the power of the performing, visual, music and literary arts to address AIDS, education, housing, health and the environment within disadvantaged communities.”  I think of it as Proactive Arts Education.

Well, Karen had approached me in November of 2010 about teaching a Photoshop class for photographers. I was pretty excited about this opportunity. I have a tendency to try to squeeze in a lot of information into my adult classes, and such was the case with this one. As I had stated in another post, The Occasional Student, adult students really want the information, but you still have to make the information practical and accessible. This class of students ranged from seasoned veterans to people who just bought a camera. There were also designers in the mix, for both web and print.  My goal is to be sure that each student comes away with information that is useful to them and their photography. So, I mixed it up a bit with straight lecture, demo tutorials, and hands on tutorials. What I observed was that, all three worked, but the Demo/Hands-on seems the way to go. That seemed to flush out all issues people had with their computer/software setups. For me it meant getting of my butt and going to students with unique issues. Ah, back in the classroom again!

All in all, it was a great afternoon of fellowship and learning for everybody. Karen, a graphic design and PR pro was right in the mix! Toward the end of the class she announced that she would organize a “Part II” for this class. I wanted the students of go outside to shoot some new images, but at 16°F we opted to  “shoped” and stay indoors!

I’m looking forward to Photoshop for Photographers: Part II this spring.

 
Share

October 10, 2010

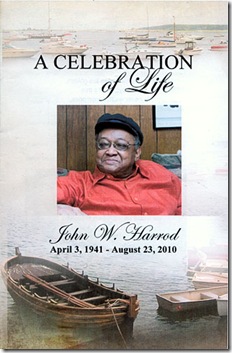
John Harrod and Friendship House

John-Harrod1 copy This weekend I attended a Life Celebration for one of Washington, DC’s strongest arts and community advocates/activists, John Harrod. I first met, John Harrod when I was a very young photographer, still attending Howard University around 1972.  While I’d been a “working” photographer for about a year and a half, I was for the most part, cloistered in the world of University. My photography professor told me about a possible job teaching kids photography in SE Washington, DC. I was excited about the opportunity  to do anything related to photography that was off campus, so I went over to Friendship House to meet John Harrod, not knowing what to expect.

As I remember it, Friendship House was a large, grey, three story Victorian house. Inside was a children’s community center, an after-school and weekend place for kids in the neighborhood to get off the streets and “hangout”. Little did those kids realize that they were being tutored and educated on how to be productive and pro-active members of their local, national, and global communities. That was John Harrod’s style. Well I got the job. Little did I know at the time that I was now being tutored on being an arts educator. I really loved the job, and the kids were great. There was, however, a “senior photographer” there, and being a young and quite naive photographer, I was ready to learn  all I could from him. Man this guy raked me over the coal at every opportunity! Plus. he love to do this in front of kids.

OK, I figured I could handle this treatment, but I really couldn’t. One day after a pretty grueling day at work in the University Medical Center photography lab (Then Freemans Hospital), I went over to the “House”. There was no Metro back then, so the bus ride from NW to SE Washington during rush hour was long. Oh yeah, and to was summer! When I finally arrived the kids were there ready to go, and so was the elder photographer. Man, he jumped all over me for being late. Well, my head was hot, and my fuse was short, I let them have it, and I stormed out of there vowing never to return. That night I got a call from Mr. Harrod. He told me to please come in the next day so he could talk with me. That was his style too. Always face to face with matters he felt were of importance.

OK, so I go to see him, and I get my first lesson in real world diplomacy. Mr. Harrod tells me that he “needs” me for his photo program to grow with new and fresh ideas. He then gives me the history of the other photographer and why he needs him and why the other guy needs the program. The other photographer, who for me at twenty something see him as a elder, help to build the program from the ground up. It is his way of giving back to his community. Remember this is a time not even ten years from the formal end to segregation nationally, and DC was still a city very much segregated. This was his domain. OK, I got it. I see the big picture, that all this really has nothing to do with me. It really doesn’t have anything to do with photography! It all about community building and neighborhood preservation. So, from that moment on, I didn’t need to check my ego at the door because I left it back at my apartment.

Things went very smoothly after that talk. I apologize for my behavior to the photographer in front of the kids, with John Harrod standing in the wings. Man, that was hard to do, but in the end it was well worth it. It wasn’t until some years later when I was giving that very same talk John Harrod gave me, to a young student photographer of mine, that I realized something. Mr. Harrod had also given that talk to the other photographer too! Man he was good. What a diplomat.

John Harrod was in his thirty’s when I first met him. He was still an older adult to me, and I was brought up to call people “Mister”. He wanted me to call him John, which took a little getting use to. Today I think of him as an elder statesman who was working on the front lines. He showed me why education was so very important, and if I could teach, I should teach. During his Life Celebration I thought, “Man, every student I ever had owes a lot to my first education mentor, John Harrod and my experiences at Friendship House.

 
Share

September 29, 2010

The Occasional Student

This past week, I had an opportunity to sit in on several Photography Portfolio Reviews with students at the Art Institute of Washington. The Institute has a great photographic imaging program that was built from the ground up, not one refitted onto a traditional photography program. It was odd not smelling fixer as I walked through its hallways. These students have all of the latest hardware and software at their disposal. It was interesting to see that with all this technology and a terrific faculty in place they were still like the students I had at Howard University back in the 1980s & 90s! No comment on my high school art students at the Ellington School of the Arts during the past ten years! So, nothing really changed except the tools they were inundated with learning. Very interesting.

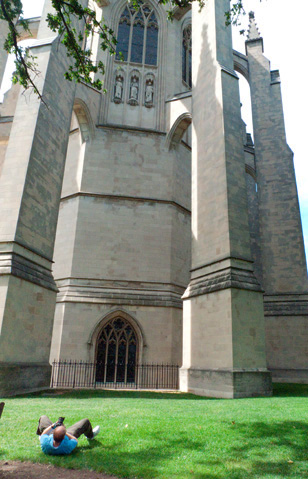
When going over the work of these students and in conversation with them, I thought back on a couple of students I worked with as a freelance instructor for Panasonic’s Digital Photo Academy. These were two guys were my peers in age that loved photography, and just kinda did it “on the side”. I was teaching or instructing an Advance Photography class from 9:00AM to 5:00PM. After a brief introduction at Starbucks, I took them to the National Cathedral here in Washington, DC. We shot for six hours straight, with no break! Six hours without any whining, just non-stop photography.

Mike, going for the shot

Mike, going for the shot!

They asked a lot of questions about photography, as well as, telling lots of stories about their photographic and non-photographic lives. As photo enthusiast, that brought all of their photo equipment, so they could be “ready” for anything. The first thing I did was to have them travel light. No more than two lenses and a tripod. They were amazed that the only camera I brought my Panasonic LX3. But I also brought some Lensbaby stuff for them to use and my laptop. We never even used that Lensbaby stuff, no time, they were in The Zone.

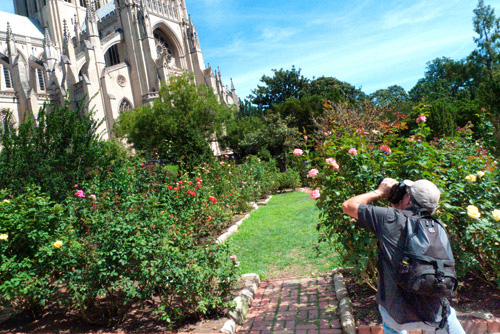
Steve using the Cathedral as the background element

Steve, using the Cathedral as the background element.

At the end of the day we were in the Cathedral’s Observation Deck that has a great view of DC, Maryland, and Virginia! I pulled out my laptop and went over their photos, and showed a couple of very quick Photoshop processing tricks. Gave them both a “Goodies Disk”, like I get at Photoshop World, and a little “homework” assignment to make a Blurb book from their photos. Then we all limped off into the sunset. It was a great day of photography.

Those guys, Mike & Steve, were just the kind of Photography students you want. They love photography, and the gadgets and toys that come with it. Most of all they were open, I mean wide open, to the vocabulary of artist vision in hearing and listening to their creative voice. That’s something that the full time student doesn’t do, but the occasional student is actually hungry for. I commented to Mike about this, and his response was, “Hey, here you’re not babysitting! We want to learn.”

Well they’re ready for my Photoshop class, and so am I. I’m looking forward to my next photography classroom, filled with occasional students.

Slideshow:
Fullscreen:

 
Share
Older Posts »