Glyphs of Time :: a blog by jarvis grant

December 20, 2011

Eddie Tapp: Image Rescue Webinar

This webinar is part of x-rite’s educational series of color management webinars. I found that this webinar was extremely informative, and clear approach to understanding how to correct image color problems. This video by Eddie Tapp is about one hour long, but moves quickly. Definitely worth a bookmark.

Webinar: Image Rescue for Problem Files with Eddie Tapp! from X-Rite Photo on Vimeo.

 
Share

The Adobe InDesign Online Cheat Sheet

Filed under: Digital Tech,Education,How-To — Tags: , , — Jarvo @ 12:46 pm

I have found that sometimes the best and fastest way to get to info that I need is to post it on my own blog! Here’s a great resource I found on Terry White’s blog. The Adobe InDesign Cheat Sheets.

Complete List of InDesign Shortcuts

Courtesy of Business Stationery

 
Share

October 4, 2011

Photoshop’s Content Aware Fill: The Agony & the Ecstasy

When Adobe’s Photoshop CS5 was introduced, its biggest marketing ploy…uh I mean creative feature was Content Aware Fill. This feature allows you make a selection around some visual annoyance and like magic Photoshop will fill the selection with whatever is around or near the object in question. So if someone should walk in front of you while taking a photo, you can eliminate them using Content Aware Fill. Now in the old days of film, you would simple wait for a clear shot, but that’s so old skool!

So why Agony & Ecstasy? Some of you may remember that 1965 big budget film The Agony & the Ecstasy with Charlton Heston as Michelangelo and Rex Harrison: Pope Julius II. In a nutshell, The Pope wants sculptor Michelangelo to paint the Sistine Chapel ceiling, while Michelangelo wanted to sculpt the Pope’s tomb. So because the Pope had the power, he made a sculptor paint! And on his back 50 feet above the floor! It’s the same old story, corporate demands against designer vision, the marketing department’s messages against the design department’s voice. What’s all this got to do the Content Aware Fill? Adobe’s marketing department pushes feature sets to the weakest or newest users of their flagship product, Photoshop. Pushing fetures that “fix” apposed to features that “create”. This content aware feature is powerful when used as a creative tool. Here’s one way.

In this example, I’ll use Fig.1. Normally, we would use the, Content Aware Fill (CAF), to get rid of some out of place element, like the building to the right. Here I’ll use the couple walking on the sidewalk. First, I’ll use the Quick Selection Tool to select the couple. Just a Note: CAF does not “create” content, it replicates content found near the selection. I choose the walking couple because they were on the grassy plane. I didn’t choose the person in front of the bus top because Photoshop would not be able to Create the missing segments of the bus shop. For best results, after the selection is made go to Select/Modify/Expand and choose about 4-16 pixels. When this is done Photoshop will compare those pixels inside of the selections border with those near the outside of its selection border. It will take that information and guess at what should be on the inside. Once we have the selection hold Shift/F5 to bring up the CAF dialog box (Fig.3), and click OK, and like magic, the couple is gone. Now, there’s always a little Stamp (Clone) Tool cleanup, but 90% of the work is done (Fig.4).

Slideshow:
Fullscreen:
Okay, now when I took this photo, the subject was the sky and those beautiful lush clouds. I wanted the clouds that were near the horizon and didn’t want to lose them by tilting the camera higher. I then suddenly thought of CAF! Get rid of everything except the clouds. This should work great on an organic fractal pattern element like clouds. When I got back to the studio, I tried it and it worked like a charm Fig. #5 – #10. I simply selected the bottom of the image with the Lasso Tool and hit Shift/F5. I thought I was done because I just want some cloud pictures as elements with other photos., so I tried it again. This time I hit Ctrl +J (Cmd+J for Mac) and created a duplicate layer of the original shot. On Layer 1 I did that CAF magic. Now for fun, I made a layer mask (FIG.6) and brought back the person walking on the sidewalk along with their shadow. This looked natural because all the lighting was the same!

This was looking pretty good, but something was missing. The story was almost there, this person walking in the clouds needed a destination or something, so I added a Moon. This planet was made in Photoshop using Flaming Pear’s LunaCell plug-in filter. LunaCell creates instant planets. Fractal, reality-based, or start from scratch to make strange new worlds. I got a couple of atmospheric moon already and just added one using the Blend Mode of Screen.

Slideshow:
Fullscreen:

By thinking of creating an image not fixing a photo, I was able to turn a gorgeous day in Washington, DC, from urban landscape into a Dreamscape. In part with the help and power of Content Aware Fill and a little personal vision.
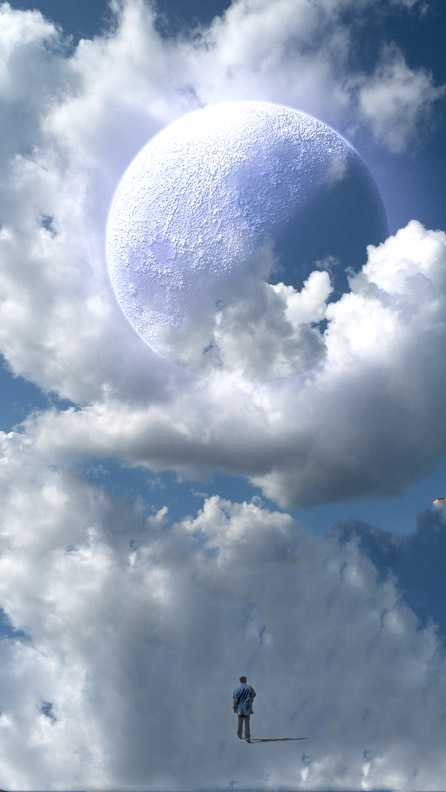
The Dream Catcher

The final image with all of its new elements in place, ©Jarvis Grant

All images & rights. ©Jarvis Grant

 
Share

September 14, 2011

Amtrak Northeast Regional: Part 1

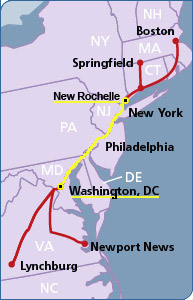
Amtrak Northeast Regional Map

My route from Washington, DC Union Station to New Rochelle, NY.

I’ve been traveling on Amtrak since I was in college in the early 1970s. During those days the train only stopped at New York Penn Station. Now Amtrak’s Northeast Regional,  stops a little closer to my hometown of Mt. Vernon, NY at New Rochelle, NY. So, for the past three years I’ve been going up to New York on a more regular bases, about 5 times a year. Checking in on my Mom and my daughter, Maya. Now, Maya grew up in DC, but has recently moved up to New York to live her dream of being an artist and helping her Grandma. She’s really making a go of it and is doing better at it then in DC. I find that interesting because DC is a smaller creative market than New York, and a bit easier to break into. But New York is more progressive and a real art town.

Okay, now during all those years of riding the train, I would a photograph here and there, no big deal. Spent most of the ride sleeping. During the past three years I got a really nice point & shoot digital camera, the Panasonic Lumix LX3.  The camera is small, fast and pocketable with a wide angle f/2.0 Leica zoom lens. This camera allows me to shoot more pictures, about the equivalent of 7 rolls of film, on a two gigabyte memory card. I love it. Very surprised with the images I’ve been producing with during my mini train journeys.  I also carry an extra memory card and battery. That’s almost a brick of film, for those who remember film bricks!

Now a few things have been happening. The first is that I’ve been becoming more familiar with the scenic’s of the trip. Though I’ve become familiar with the views, I’m not familiar  enough to setup and be ready to take a shot. A lot is still hit and miss. A little more miss than hit it turns out! Still I’m learning how to get better shots. After all, I can’t ask the conductor to stop the train or slow it down. So I’ve worked out a methodology for shooting. It goes something like this. I tend to anticipate a photo. As we approach the scene, I’ll ten decide to push the shutter or not. If not and I feel I should have, that composition I missed will go into my mental archive of possibilities. As this archive grows, the potential of making a good shot increases. So I’ll miss “that” shot, but the possibility of something similar appearing again down the track or during another trip increases.

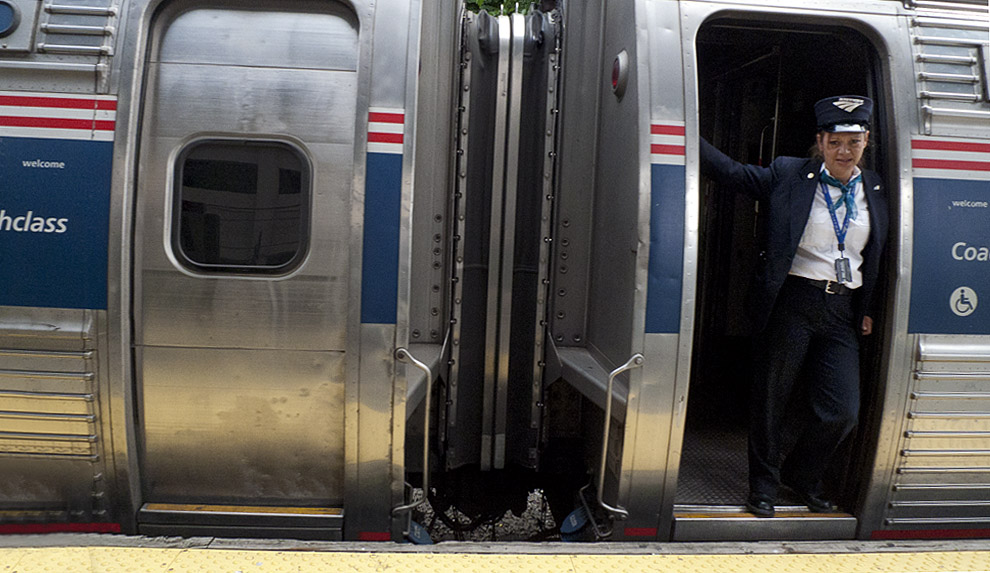
Conductor on the Amtrak Northeast Regional

Conductor on the Amtrak Northeast Regional, leaving New Rochelle, NY on to Boston. ©Jarvis Grant

The next thing that happens when photographing out the window is camera handling. When a stretch of scenery seems promising I turn the camera on so it will be ready to go. Hey the camera is fast, but it’s still a point & shoot. When I firat point the camera out the window, it takes the sensor/light meter about three seconds to adjust to the change of light and become operable, and another 2-3 seconds to focus (if I’m lucky). A lot can pass by in 6 seconds as the train speeds on. I also set the camera to “Burst Mode” so it can keep taking pictures and give be more options of a scene. The downside of Burst Mode, is the camera takes time to process those photos. During that processing time the camera can’t take any new images. Finally, if it’s bright, I put the camera on “Program” so I don’t have to think about exposure and other camera stuff. As it gets darker, I go to Manual Mode or Shutter Priority. More techno thinking and a little less esthetic thinking. Still, it’s all good fun, which is the bottom line along with having new photos.

Within this body of work there are a few thematic series. Below are a few sample images. I’m still working all these images out, sifting and sorting them out. So, in future post, I’ll share what I’ve been doing with these photos as I continue to ride the rails on the Northeast Regional.

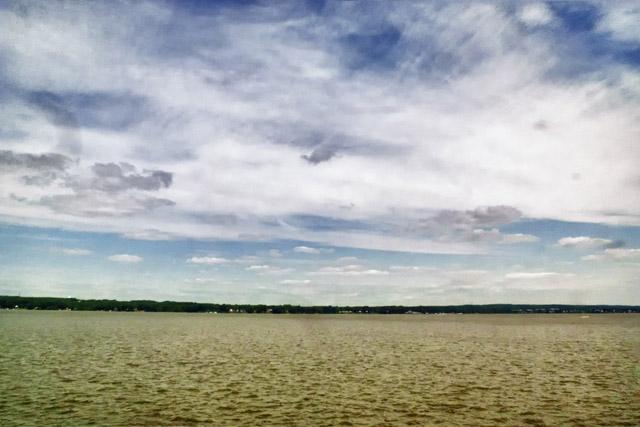
Crossing the Bay between Philly and Wilmington

Crossing the Bay between Philly and Wilmington. ©Jarvis Grant


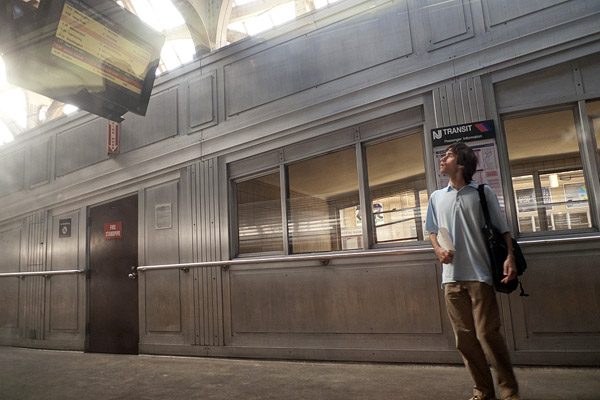
Traveler checking the time board at Newark, NJ Penn Station. ©Jarvis Grant

Traveler checking the time board at Newark, NJ Penn Station. ©Jarvis Grant


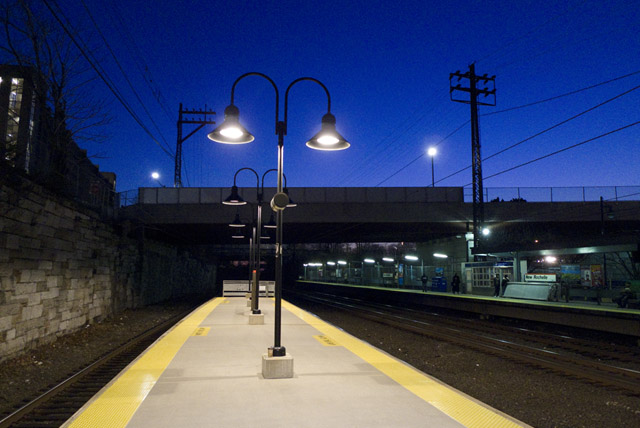
New Rochelle Station at Twilight. ©Jarvis Grant

New Rochelle Station at Twilight. ©Jarvis Grant

 
Share

June 11, 2011

Epson 4000 Series Printer Maintenance

I have an eight year old Epson Stylus Pro printer. This printer has served me well. I’ve never thought of upgrading because with my Epson 4000, I don’t have to swap out Black ink cartridges for matte or glossy papers. That’s a huge savings! Yet it is an eight year old printer, and I’m starting to notice a couple of issues with this series in general. First, this first series of UltraChrome printers are starting to reach their EOS (End of Service). Epson has upgraded their professional large format printers four times since the 4000/7600/9600/9600 series. So parts, and ink carts are starting to become less available. Second, these printer are simply wearing out. A colleague of mine just had their Epson 10000 44 inch printer “die”. So replacing that printer will be a big but worthwhile investment.

However, for me, I’m not ready to invest in another piece of equipment if I don’t have to! I’ve feel I’ve always done a pretty good job of maintaining my Epson 4000. I’ve kept its software updated, in particular its Maintenance Utility software. Still,  eight years of operation is also eight years of grime that the printer has produced. I’ve always been a little faint of heart when it comes to opening that sucker up and cleaning it out. But thanks to the Epson 4000 Yahoo Group, I ran across this great video on how to clean the Epson 4000/4800/4880/4900/3800 printers. The video comes courtesy of Condé Systems, Inc. This video shows in extremely clear terms the procedure of how to clean the most important parts of the Epson 4000 series printer inner workings. By adding this procedure to my maintenance regiment, I’ll be able to add a few more years to my trustworthy Epson 4000.

 
Share

June 4, 2011

Introducing: The Periodic Table of SEO Ranking Factors

Filed under: Design,Digital Tech,How-To,Media,Observations — Tags: , , — Jarvo @ 1:10 pm

This is a great way of understanding SEO without someone trying to sell you anything! Click on the image and go the Search Engine Land. There you can get the full guide as a PDF.
Search Engine Land Periodic Table of SEO Ranking Factors

 
Share

January 27, 2011

A Quick on Location Shoot

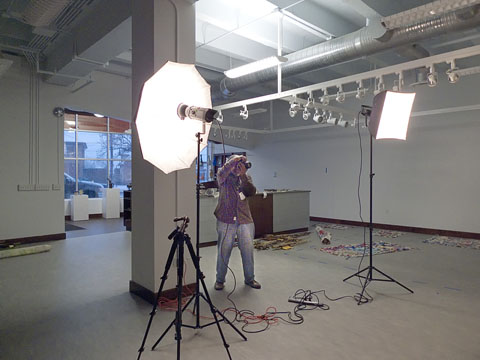
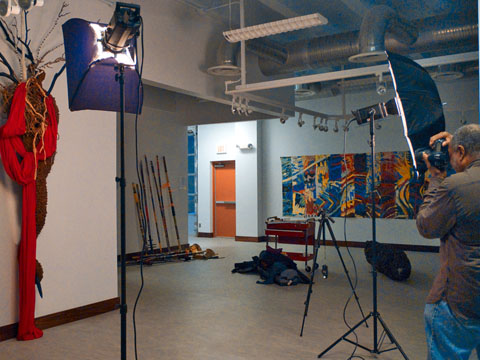
Late afternoon, Wednesday, I did a quick and dirty location photo shoot of a piece of art for my friend Martha Jackson Jarvis. The shoot took place at Prince George’s African American Museum & Cultural Center, in Brentwood, MD. Martha will be in an exhibit, Resonant Forms, with artist Frank Smith, and Alonzo Davis.  OK. I was at the gallery to photograph a piece for Martha titled, Scarecrow. The reason why this was to be quick & dirty was that by the time Martha & I got to the gallery about quarter of an inch of slush from freezing rain was on on the ground. By the time I had set up my lights, about 20 minutes later, the freezing rain had turned to heavily falling snow. With about an inch of snow on the ground and an early rush hour, we all wanted to hurry up and get out of there. DC doesn’t do snow very well! 

Light setup at Brentwood Art Center

Here I'm setting exposure and angle before final shots with tripod.

Setup at the Brentwood Art Center Gallery

Me getting the setup exposures before the final shots with tripod

 The setup was pretty straight forward. Two Calumet Travelite 750 strobes. One with a small Chimera lightbox as the main light, and another Travelite with a 24 inch Calumet umbrella, as the fill. Because of the sudden state of urgency, along with Alec Simpson, director of the Art Exchange, & his staff wanting to get out of there, I didn’t have a lot of time to finesse the lighting. So after I got things up, and Martha was OK with the basics, I started shooting.  

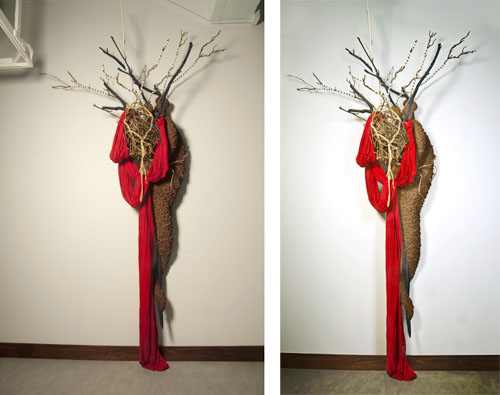
When I was shooting this shot I was thinking of how I would be doing the re-touch in Photoshop. When doing this you don’t want to be sloppy.or the retouch can go horribly wrong. This shot is for the exhibition catalog and other PR for Martha and the exhibit. So I want it to be very tight for publication. So when I got back in an choosing the best exposed RAW file, I first brought the image into Adobe Camera Raw. Here I did the basic exposure & color cleanup adjustments before exporting it into Photoshop. Next, I use Nik Define 2.0 to quickly reduce any luminous noise. I shot at ISO 200 so there really wasn’t much, but Define cleaned it up. After Define I used the Stamp tool to get rid of pipes and light fixtures that where in the way. I actually cropped the image first to minimize this work. Next there was some tonal enhancement to accentuate the lighting that was already present in the shot. This help the over all contrast. Finally I added a touch of drama and place with a burn & dodge hand painted vignette. 

I thought I was done, (and I pretty much was!) but the shadow on the image’s right side was too strong, So, I cloned it out , but that looked strange. Since the cloned data was on its own layer, I simply reduced its opacity. Now I could control that shadow, as if I changed the intensity & placement of the actual fill flash. Now I was done. I always keep the layered files, ya never can tell! I created a JPEG for Martha to give to the Gallery, and now I was done! 

Comparison of RAW & Retouched Images

The image on the left is the unprocessed Nikon RAW file. The one on the right is the retouched file.

 
Share

June 28, 2010

Painting in Photoshop CS5

Filed under: Design,Digital Tech,Education,How-To,Photoshop — Tags: , — Jarvo @ 10:23 am

Once again Photoshop CS5 shows itself to be a major upgrade. In this episode of The Complete Picture, Julieanne Kost shows you some of the new painting features in Adobe Photoshop CS5 including the new Natural Media Bristle Tip Brushes.

 
Share

June 7, 2010

Creating a Black & White Photograph

Filed under: Digital Tech,Education,How-To,Photography,Photoshop — Jarvo @ 5:07 pm

Now, this doesn’t sound like rocket science, and it isn’t, but care should be taken when making a black & white conversion from your image files. Today, many cameras have a built-in function which allows the photographer yo make a black & white image from the original color scene. While this feature is handy, you give up control of your image to an algorithm. Plus, if you’re a control freak like me, I may want that color image later. Now you may say, “Hey Jarvis, you can always flip the switch back from B&W to full color and shoot both!” And I say, “But why?” Why stand there playing with the camera instead of making wonderful photographs?

Well, in this video, I give you a Quick & Dirty overview of how to handle B&W conversion in Photoshop. You’ll see how to give yourself maximum control over many aspects of the conversion process and end up with a beautiful image that no camera algorithm or One-Click-Wow in Photoshop or Lightroom can give you.  Check it out.

 
Share

March 18, 2010

Protecting Your Images on the Web: A Look at Embedded Digital Watermarking vs. Digital Fingerprinting

Filed under: Digital Tech,How-To,Photography — Jarvo @ 12:31 am

By Laura Evenson and Kyle Gundersen, ImageSpan/LicenseStream
So you’re trolling the Web late one night and up pops an image of snowboarder that looks disturbingly familiar. It’s disturbing because you’re the only who could have shot that image of that snowboarder boosting 10 feet out of that halfpipe. What’s more, while it’s clearly your image, it is appearing on the wrong site, at the wrong time, and for an unauthorized use.
Read More, here

 
Share
Older Posts »