Glyphs of Time :: a blog by jarvis grant

July 9, 2011

Revisiting the Gigapan

A few weeks ago I pulled out my Gigapan EPIC. This is a device developed by Gigapan Systems which allows the creation of large scale gigapixel panoramas. That’s right Gigapixel panoramic images. It does so by stitching together single multi shot megapixel images. I explained this in more detail in my blog post, The Gigapan Pano Portrait. The reason for this renewed interest in my Gigapan EPIC was a project, Nearby Nature Gigablitz, sponsored in part by the Fine Outreach for Science program and  their partners at Carnegie Mellon University’s CREATE Lab. The project asked people who were members of Gigapan.org to make panos of nature that was near where they lived and worked. Since I live in walking distance to the Rock Creek National Park, went down there and setup near the edge of Rock Creek and its Bike Path.

As I shot the “still life” of the landscape I hadn’t any real problem, other than remembering the regiment of using the equipment with my Panasonic LX3. This is my “carry-with-me” camera. The LX3 is a ten megapixel point & shoot with a very nice 24mm wide 2.5x optical zoom LEICA DC F2.0 lens.  So like I said no problems, no worries. But, when I decided to have the Bike/Runner’s Path in the scene, that when I started to have some issues. Since I was by myself, I did the best I could in scouting up and down the path trying to look out for bikers & runners. I was trying to avoid traffic because the Gigapan shoots a series of aligned images that are stitched together. As much as I tried, I always got someone in the scene! Then while swatting away all manner of little flying bugs and sweat, I decided just to shoot very small panos of the Path itself, and figure it all out later.

When I got back and processed the images, converting the RAW files to TIFFs. I first worked in the more classic landscape images. Gigapaners have a tendency to create these great big panoramic images with lots of detail. Creating a very interesting image because you can zoom in and see minute details found with in the scene. That’s what happens when you have a five gigapixel image. My approach was to produce an interesting photograph first.  Light, color, composition, and what Jay Maisel calls “Gesture” are more important than the curious details I’m not even aware at the time of capture. Here are two examples from that shoot. Use the navigation controls to pan and zoom inside of the images. You can also use your mouse wheel to zoom, click & drag to pan.

Okay, now that Bike Path shot. Well I did it! I was able to create a panorama that had a clean clear path in it. To my surprise, I didn’t really like it. I mean it was a good image, but I started to think, maybe having a human element would actually be good. Since I had several “sub-sets”  of the panorama, I began to look at them. To my surprise, there were a couple of good shots in there. I had used a fairly fast shutter speed of 1/400 so the runners & bikers were all frozen in stop action. I had a couple of shots with a guy in a red shirt. With all of the lush green in the images that little spot of red was a great color contrast. Once I had the full “empty path” pano completed, I placed the single frame with the runner in the scene. His tonality was a bit off, so I adjusted his frame to match, but the runner himself, was too dark. So I made another tonal adjustment. He looked great but his frame was now off. To address with issue, I made a  Layer Mask and erased everything in the scene but him. In the words of chef Emeril Lagasse, BAM! It was done. Here’s that panorama.

One of the things I learned from this episode with my Gigapan EPIC is that you can’t let the equipment dictate your creative vision. Now don’t get me wrong, equipment dictates a lot of stuff during a shot. But it’s not the master. I guess all of those little bugs swarming around me (along with the high humidity & temp) helped to break the equipments pull on me. So that during all that the landscape itself had an opportunity to talk with me. Alter all that’s what the whole thing was really about anyway. Capturing a sense of place.

 
Share

June 23, 2011

Coming Soon to Adobe Labs: Adobe Edge

Filed under: Digital Tech,Innovation,Video — Tags: , , — Jarvo @ 5:16 pm

Adobe is working on yet another tool designed to create content for mobile devices., Adobe Edge. Edge will be able to create Flash-like content or animations using javascript, HTML 5, and CSS. After Apple thumbed their noses at Adobe by not allowing iPhones and the iPads to support Flash content. I guess Apple thought that developers would drop Adobe & Microsoft tools and come running to Applescript because the iPad was so cool and popular. What were they thinking. Did they really think that Adobe would simply hang their head down, kick the dirt, and go home? Or, was this some evil ploy to get Adobe to build a tool that they were simply to lazy or incapable of building themselves?

At any rate Adobe is continuing to forge ahead with developing new tools for the creative pros to create interactive content for mobile devices. You can find out more about Adobe Edge at the Adobe Labs web site and the Adobe Edge Facebook page.

 
Share

June 11, 2011

Epson 4000 Series Printer Maintenance

I have an eight year old Epson Stylus Pro printer. This printer has served me well. I’ve never thought of upgrading because with my Epson 4000, I don’t have to swap out Black ink cartridges for matte or glossy papers. That’s a huge savings! Yet it is an eight year old printer, and I’m starting to notice a couple of issues with this series in general. First, this first series of UltraChrome printers are starting to reach their EOS (End of Service). Epson has upgraded their professional large format printers four times since the 4000/7600/9600/9600 series. So parts, and ink carts are starting to become less available. Second, these printer are simply wearing out. A colleague of mine just had their Epson 10000 44 inch printer “die”. So replacing that printer will be a big but worthwhile investment.

However, for me, I’m not ready to invest in another piece of equipment if I don’t have to! I’ve feel I’ve always done a pretty good job of maintaining my Epson 4000. I’ve kept its software updated, in particular its Maintenance Utility software. Still,  eight years of operation is also eight years of grime that the printer has produced. I’ve always been a little faint of heart when it comes to opening that sucker up and cleaning it out. But thanks to the Epson 4000 Yahoo Group, I ran across this great video on how to clean the Epson 4000/4800/4880/4900/3800 printers. The video comes courtesy of Condé Systems, Inc. This video shows in extremely clear terms the procedure of how to clean the most important parts of the Epson 4000 series printer inner workings. By adding this procedure to my maintenance regiment, I’ll be able to add a few more years to my trustworthy Epson 4000.

 
Share

June 4, 2011

Introducing: The Periodic Table of SEO Ranking Factors

Filed under: Design,Digital Tech,How-To,Media,Observations — Tags: , , — Jarvo @ 1:10 pm

This is a great way of understanding SEO without someone trying to sell you anything! Click on the image and go the Search Engine Land. There you can get the full guide as a PDF.
Search Engine Land Periodic Table of SEO Ranking Factors

 
Share

May 18, 2011

Technology vs. Marketing

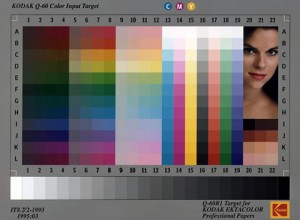
KODAK-Q-60-Color

The KODAK-Q-60-Color Standard

The other afternoon, I watched a webinar from a company I respect a lot, but won’t mention here. They have developed a new “technology” of color management. This technology is software based, and does a really amazing job of creating a complete and cohesive workflow of managing color from initial capture to final output. Now what I found interesting about this hour long webinar was it spent roughly 30-35 minutes marketing the product. It disguised or maybe cloaked this market hype in techno-babel. This techno-babel was used to give the audience “background” on the importance of color management. Okay. I guess?

My problem with the introduction was that, this technology was touted as a professional level tool. If that’s the case, then everybody tuning in knows that color management is. Right? OK, so after the intro, the software & its hardware components were explained, again. We were about 40 minutes into the webinar and the presenter ask moderator if there were any questions. The collective question was, What is the “best” or most practical way to operate the software and its hardware components? So, after 40 plus minutes of presentation the main question is, “How ya use the thing?” And why is that? Because the presenter used 35 minutes selling the damn thing!

This is my main concern with “Technology”. The company’s marketing department gets their hands on the concept and dumb it down to bullet points for PowerPoint presentations. Then they’ll express the concept’s innovation as price points. So, in the case of this webinar, the beauty of this software wasn’t made clear until the last 15 minutes of the presentation. And if not for the collective “What?” from the audience, it may have never come to light. As an educator for over 30 years, I believe the presenter could have been of better service to his audience by telling or teaching them why this equipment better serves their color management workflow. Yet this is the trend when speaking to photographers about anything “digital” or “high tech”. Toss them a bunch of tech-babel at a high enough price tag and they’ll bite. Why? Because if the concept is just barely comprehensible and cost enough it must be good. Thus placing one on the road to fame and fortune! Oh well.

I learned a long time ago that there’s a difference between technology and instrumentation. Technology is the concept or system behind an activity. Instrumentation is the tool for producing the results of that system. The technology of photography hasn’t changed much since 1840. The instrumentation and equipment on the other hand has. The aesthetics of photography and art in general are constantly in flux, yet the principles of design still hold true, for the most part.

So, what about the technology of color management and why one needs it? I think Andrew Rodney, gave a great example of it a few years ago at Photoshop World. He stated that color management is; “The ability to accurately and predictably control the reproduction of images from beginning to end of the imaging pipeline.” Color management is not, “Fixing bad color, especially bad originals.” The technology fixing incorrect color is Color Correction. Color management will ensure that “…even ugly color will be faithfully reproduced.”  So, the old adage still remains true, GIGO – Garbage In – Garbage Out.

So again, technology is a system or concept, not an instrument. I feel the presenter and the company could have explained their product without all the marketing hoopla.  If they would have done that the innovation of their product would have really shined. Here’s a very visual example of the technology of color management, and why you can’t trust your eyes alone to “manage” color. ©Edward H. Adelson

Slideshow:
Fullscreen:

 
Share

February 10, 2011

The Fujifilm FinePix X100: Back to the Future

The Fujifilms FinePix X100 Camera

Is the X100 the shape of things to come?

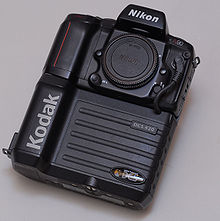
I think that the professional digital photography industry is starting to settle down. In the beginning just being able to capture an image was amazing stuff. Back in 1991, the first Kodak cameras the DCS 100, were mangled Nikon F3 bodies attached to a humongous contraption were all of its computer components lived.

Kodak DCS 420 body

The 1994 Kodak DCS 420 was a lot of camera for 1.2 megapixels!

Quite a monster, considering it was 1.2 megapixels! Since that time the DSLR has evolved into a tool of more manageable size, speed, and power. The typical pro DSLR body is a grand configuration of buttons and wheels, digital readouts of text, numbers, graphs, and images. While it looks kinda like a camera, I’m still reminded of seeing Dean Collins give a presentation at Photo Expo East in the mid 90’s. He had a “high-end” Foveon digital camera which looked like a laptop with a lens on it. Hey, in essence, that’s what a digital camera is , a computer attached to a lens.

This year Fujifilm has announced a camera that has shaken things up a bit. They have introduced a camera with mechanical parts. A camera with a shutter speed dial on the body, and an f/stop ring on the lens. It looks like a rangefinder, but it’s not. It looks expensive, but it’s not, relative speaking that is. It is the FinePix X100. It actually reminds me of my very first camera, the Petri Racer, but looks more like a Leica M3. Leica also as a mechanical looking camera that’s less than $2000, the Leica X1. The X1 doesn’t have its f/stops on the lens, but on a dial on the body. The X1 is a good looking camera, very sleek. It maintains its heritage and looks much like the camera Oskar Barnack created back in 1914 and introduced to the public in 1925 Still the X100 has got its “retro” down.

I received an email today from Fujifilm releasing the first “official” sample images created by the X100. As usual these aren’t great pieces of photographic art, but they do show off the technical aspects of this 12 megapixel camera. I won’t bore you with the technical specs, you can check out the preview of the camera at Digital Photo Review. The thing that excites me about this camera is that, well, it’s a camera. I love cameras and their gadgets. The X100 takes me back to that time were the magic of photography had embraced me. I time were all I needed to know was shown to me at a glance without having to turn the camera on. Yet the X100 will give you that warm fuzzy feeling plus all of the techno stuff one feels they must have with a modern camera.

This was a bold, brave move on the part of Fujifilm. They know there are photographers out there who know what they’re doing. And by that I mean photographers who love making images, or maybe I should say , love taking shots! Great shots with a minimal equipment complement. This camera doesn’t seem as “pocketable” like my Panasonic LX3, but it has a bigger APS-C CMOS sensor. I don’t any other compact camera has a sensor as big except for the Leica X, that is not a 4/3 camera, which is smaller than the APS sensor. So it’s closer to my Nikon D200 DSLR with out the bulk. A good “take everywhere” camera. I hope that this will be a new trend for camera manufactures, making small “serious” cameras.

Slideshow:
Fullscreen:

 
Share

January 27, 2011

A Quick on Location Shoot

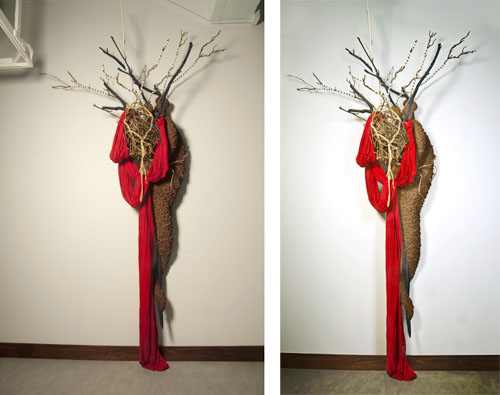
Late afternoon, Wednesday, I did a quick and dirty location photo shoot of a piece of art for my friend Martha Jackson Jarvis. The shoot took place at Prince George’s African American Museum & Cultural Center, in Brentwood, MD. Martha will be in an exhibit, Resonant Forms, with artist Frank Smith, and Alonzo Davis.  OK. I was at the gallery to photograph a piece for Martha titled, Scarecrow. The reason why this was to be quick & dirty was that by the time Martha & I got to the gallery about quarter of an inch of slush from freezing rain was on on the ground. By the time I had set up my lights, about 20 minutes later, the freezing rain had turned to heavily falling snow. With about an inch of snow on the ground and an early rush hour, we all wanted to hurry up and get out of there. DC doesn’t do snow very well! 

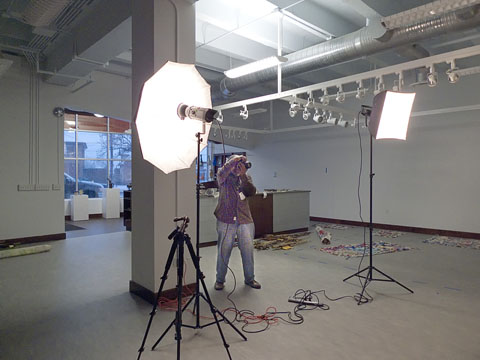
Light setup at Brentwood Art Center

Here I'm setting exposure and angle before final shots with tripod.

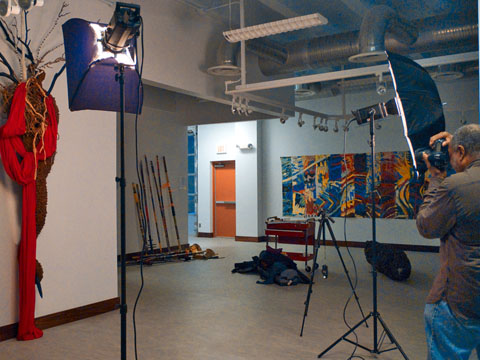
Setup at the Brentwood Art Center Gallery

Me getting the setup exposures before the final shots with tripod

 The setup was pretty straight forward. Two Calumet Travelite 750 strobes. One with a small Chimera lightbox as the main light, and another Travelite with a 24 inch Calumet umbrella, as the fill. Because of the sudden state of urgency, along with Alec Simpson, director of the Art Exchange, & his staff wanting to get out of there, I didn’t have a lot of time to finesse the lighting. So after I got things up, and Martha was OK with the basics, I started shooting.  

When I was shooting this shot I was thinking of how I would be doing the re-touch in Photoshop. When doing this you don’t want to be sloppy.or the retouch can go horribly wrong. This shot is for the exhibition catalog and other PR for Martha and the exhibit. So I want it to be very tight for publication. So when I got back in an choosing the best exposed RAW file, I first brought the image into Adobe Camera Raw. Here I did the basic exposure & color cleanup adjustments before exporting it into Photoshop. Next, I use Nik Define 2.0 to quickly reduce any luminous noise. I shot at ISO 200 so there really wasn’t much, but Define cleaned it up. After Define I used the Stamp tool to get rid of pipes and light fixtures that where in the way. I actually cropped the image first to minimize this work. Next there was some tonal enhancement to accentuate the lighting that was already present in the shot. This help the over all contrast. Finally I added a touch of drama and place with a burn & dodge hand painted vignette. 

I thought I was done, (and I pretty much was!) but the shadow on the image’s right side was too strong, So, I cloned it out , but that looked strange. Since the cloned data was on its own layer, I simply reduced its opacity. Now I could control that shadow, as if I changed the intensity & placement of the actual fill flash. Now I was done. I always keep the layered files, ya never can tell! I created a JPEG for Martha to give to the Gallery, and now I was done! 

Comparison of RAW & Retouched Images

The image on the left is the unprocessed Nikon RAW file. The one on the right is the retouched file.

 
Share

August 18, 2010

HARMAN Professional Inkjet by Hahnemühle

Filed under: Art History,Digital Tech,Observations,Photography — Jarvo @ 12:53 pm
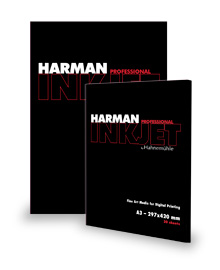
The New HARMAN inkjet paper from Hahnemuhle

The New HARMAN inkjet paper from Hahnemuhle

This is very interesting. Two giants in the paper industry have combined their efforts. Hahnemühle, a German fine art paper maker since, that has been operating paper mills since 1584. HARMAN is no new kid either. Alfred Harman, the founder of the company ILFORD in 1879 making dry plates,  has been making color photographic materials that go back to the first  practical application of color photography with the Lumière brother’s Autochrome process in 1903. So these two companies know what to do with paper and photographic imagery.

This should be a very interesting paper. The paper even smells like wet darkroom paper because of its true Baryta coating. One of the things that wet darkroom photographer have been looking for is a paper that looks and feels like an air dried glossy paper. This may be it. I’m looking forward to trying it out to see just what is what .

 
Share

June 28, 2010

Painting in Photoshop CS5

Filed under: Design,Digital Tech,Education,How-To,Photoshop — Tags: , — Jarvo @ 10:23 am

Once again Photoshop CS5 shows itself to be a major upgrade. In this episode of The Complete Picture, Julieanne Kost shows you some of the new painting features in Adobe Photoshop CS5 including the new Natural Media Bristle Tip Brushes.

 
Share

June 7, 2010

Creating a Black & White Photograph

Filed under: Digital Tech,Education,How-To,Photography,Photoshop — Jarvo @ 5:07 pm

Now, this doesn’t sound like rocket science, and it isn’t, but care should be taken when making a black & white conversion from your image files. Today, many cameras have a built-in function which allows the photographer yo make a black & white image from the original color scene. While this feature is handy, you give up control of your image to an algorithm. Plus, if you’re a control freak like me, I may want that color image later. Now you may say, “Hey Jarvis, you can always flip the switch back from B&W to full color and shoot both!” And I say, “But why?” Why stand there playing with the camera instead of making wonderful photographs?

Well, in this video, I give you a Quick & Dirty overview of how to handle B&W conversion in Photoshop. You’ll see how to give yourself maximum control over many aspects of the conversion process and end up with a beautiful image that no camera algorithm or One-Click-Wow in Photoshop or Lightroom can give you.  Check it out.

 
Share
« Newer PostsOlder Posts »